No, I haven’t gone crazy; in fact quite the opposite. I was sent a visualisation of a wind farm from a company this week, and the back of my mind was niggling at me, telling me that I could do better at little or no cost.
My first few attempts were involving QGIS2Threejs (QGIS 3D plugin), where I could create some great accurate 3D terrains but couldn’t for the life of me get the .json models to work. There are many tools out there to convert 3DS, Collada and skp models into .json models, but even when building and testing one myself in mrdoob I couldn’t get it to work within QGIS2Threejs. I had to leave it in fear of my sanity.
The second attempt was using ArcGIS and ArcSCENE. Again, as with QGIS, it was easy to create the terrain, but with both ArcSCENE and ArcGIS Pro, I found that the 3DS, Collada, and skp models degraded and became shockingly poor quality when rendered on the terrain. Although there were controls for materials, they always looked like they had been rendered by a Commodore 64.
The final attempt involved using Topaz 3D and Unity. The hardest part was bringing the terrain in: there were many steps to manipulate the height data to strip all but the heights out and to get them into RAW format. Then I had to reference the bottom left extent to x=0 & y=0. The result looked better, but I feared the geographic locations weren’t correct.

Google Earth output
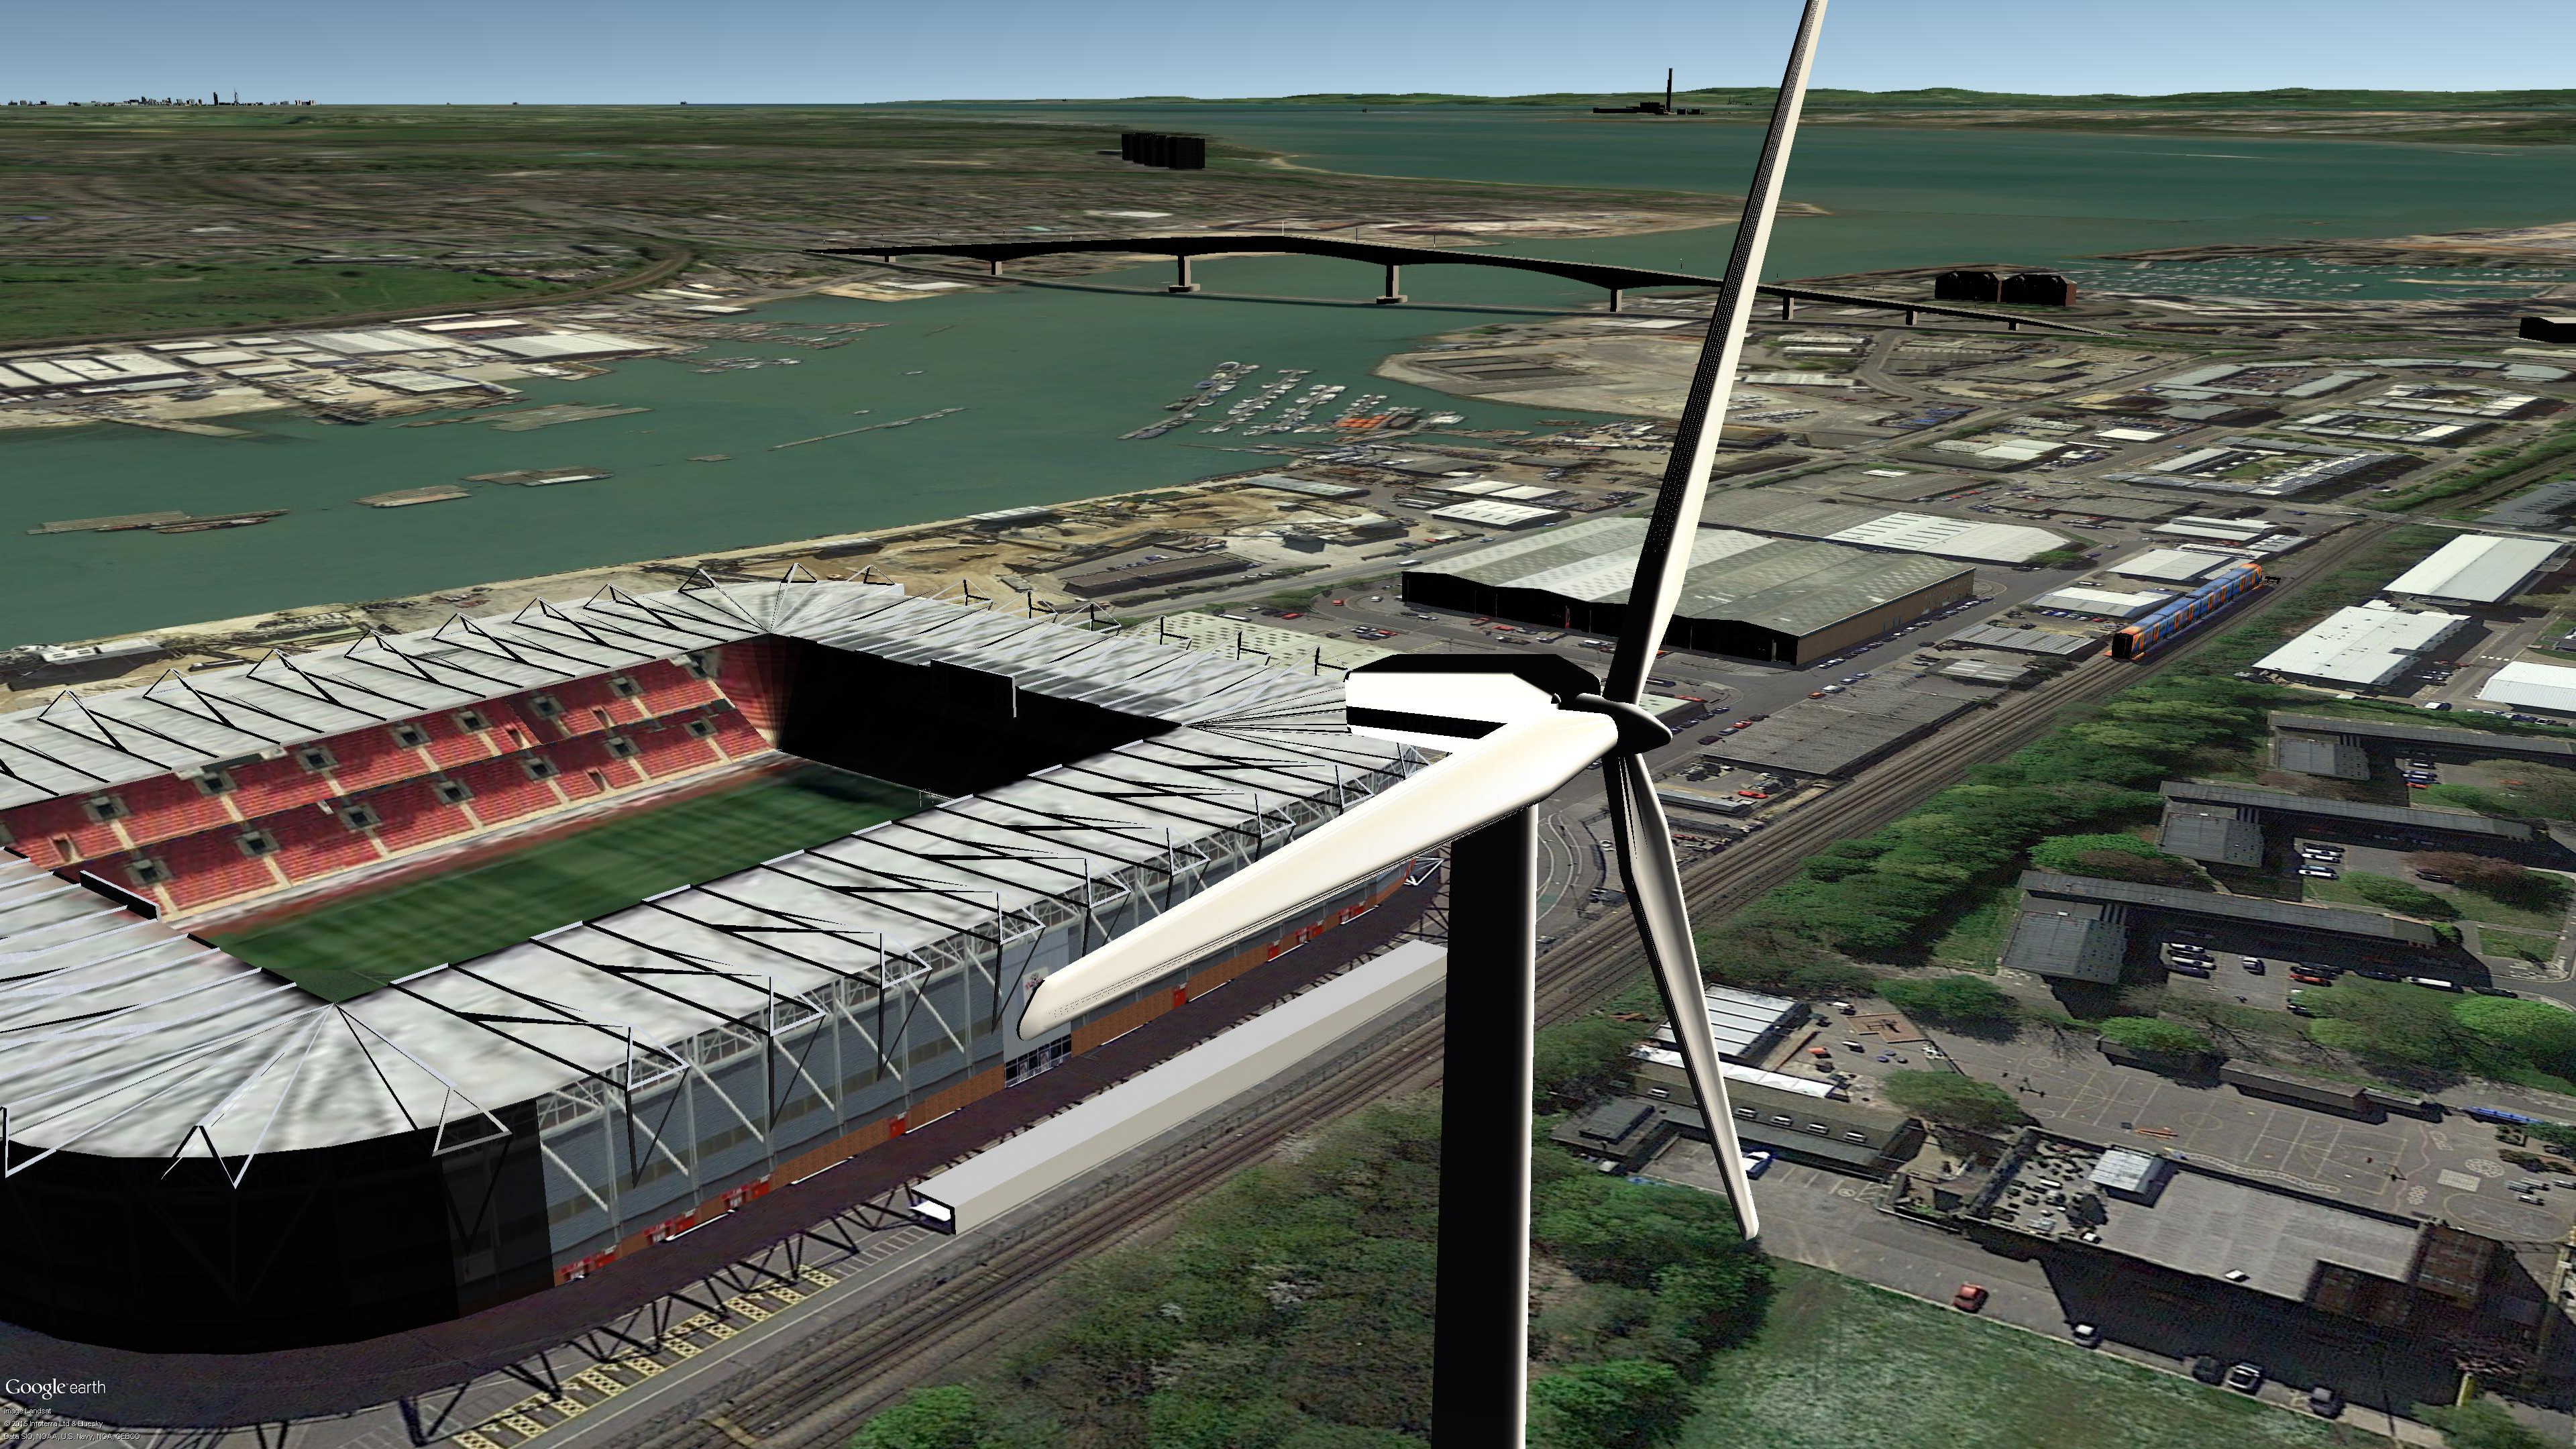
I hit on the idea of having a look at Google Earth. After all, the models have always been drawn well, and it has many of the cities with 3D buildings in. I wasn’t prepared for what came out: the above screengrab was only the start. Google Earth Pro is now available for free, which allows for higher resolution output images (see above), and also there are options to scroll through the time of day with beautiful constellations and moonlit shadows.
Below is a “how to” if you wish to try it yourself.
Install SketchUp Make (Free for personal use; SketchUp Pro at cost for business use) and install Google Earth Pro (Free for personal use; limited license for commercial use).
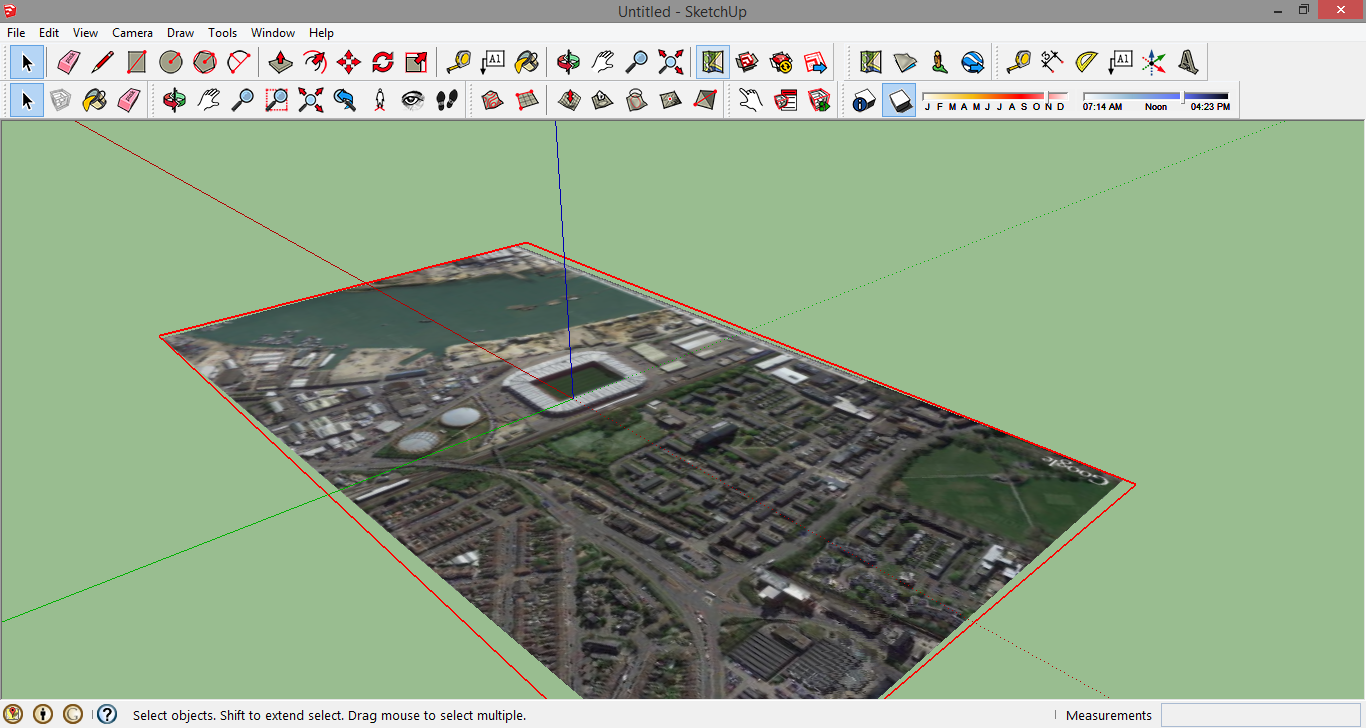
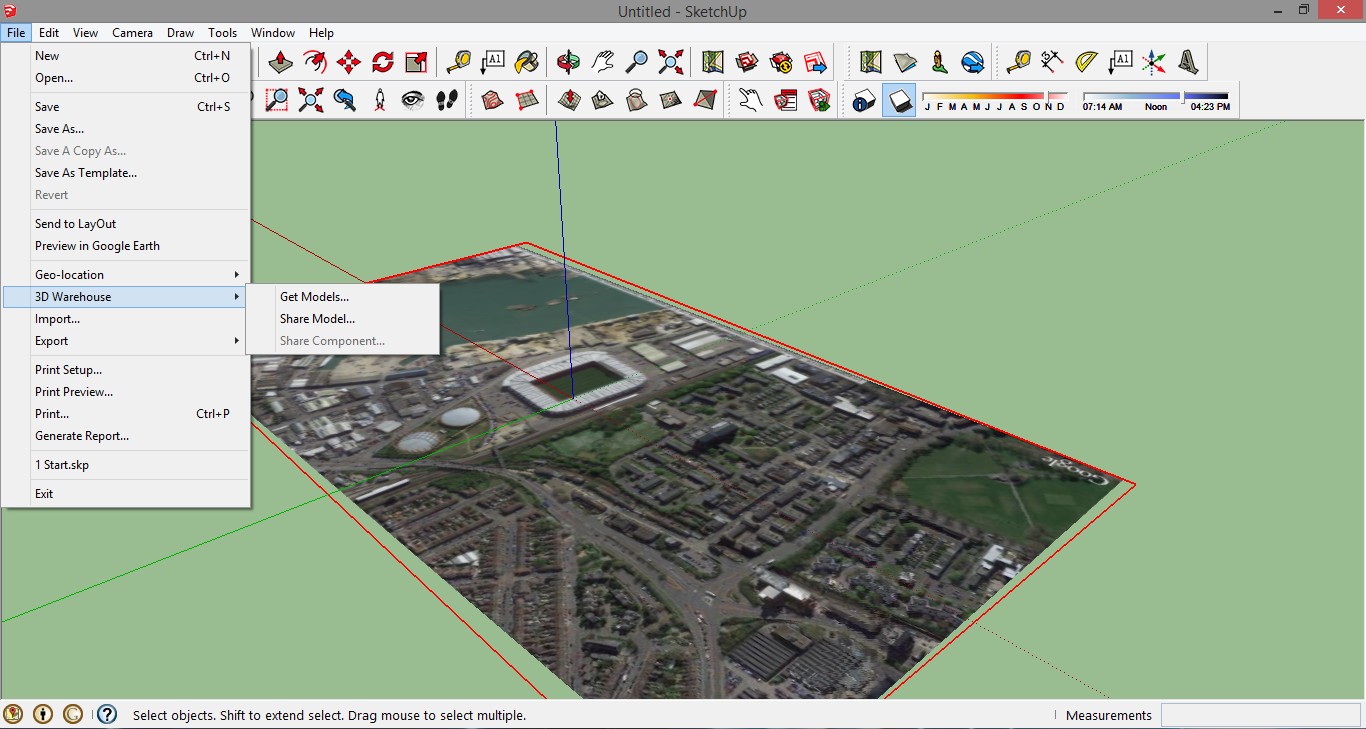
Add Imagery
First off, add the Google Earth imagery through the “folded map” button (light blue, above). This will provide your model a real world location.
 1. Select your location.
2. Center the screen on the location you plan to put the model.
3. Hit the “Select Area” button in the top right. When asked again, select the “grab” button.
Add your model. This can be done by either downloading a pre-made model from the “3D Warehouse” (beware copyright clauses) OR you can draw one up yourself. For the purposes of this demo, I will add a simple turbine from the warehouse.
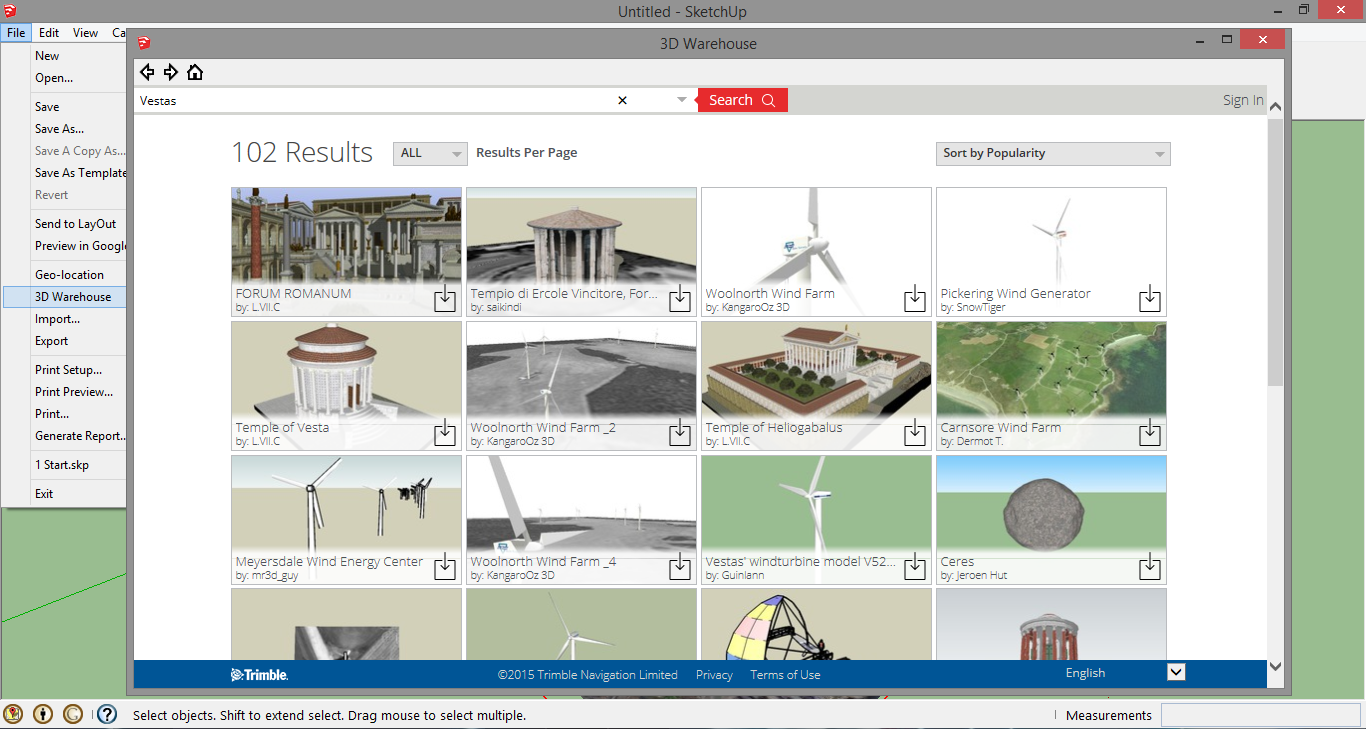
Select one of the models, and when asked add it to your project. Yes, that simple!

Toggle your terrain
Move the feature to where you want it using the “move” tool (the red cross tool). Turn on the terrain (usually next to the Streetview man) and then re-adjust the feature so that it sits correctly. Note that this uses Google Earth terrain data; your own may be added.

Adjust your shadows and edges
The model currently looks a little cartoonish. Turn off the “edges” and then turn ON the shadows.
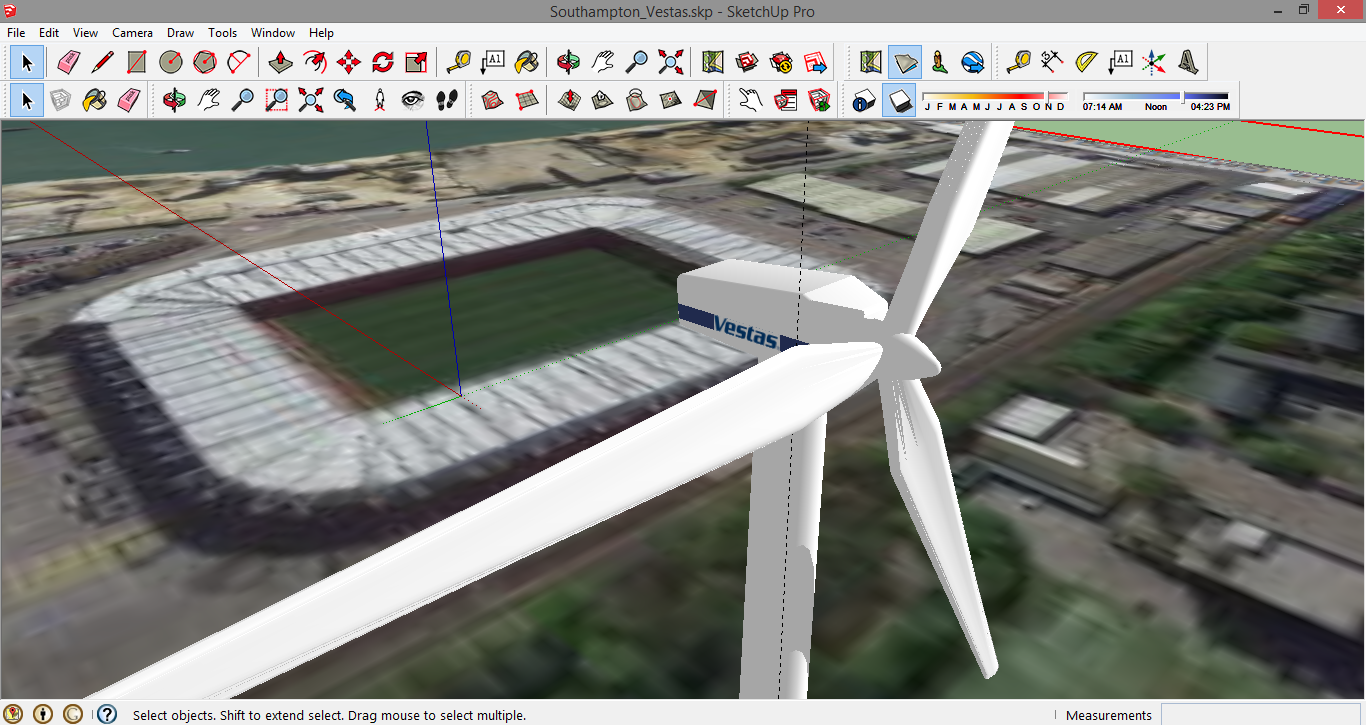 The same image without edges and shadows turned on. makes a big difference. I think we’re ready to open this up in Google Earth!
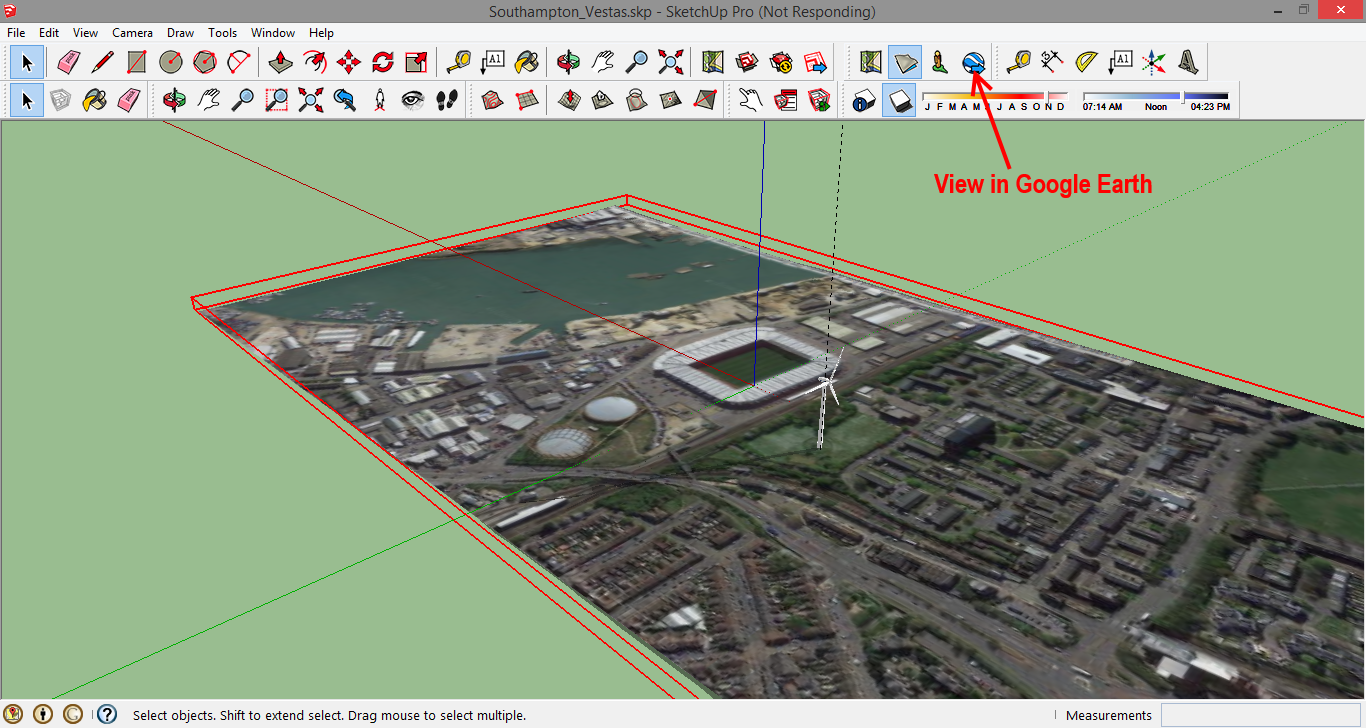
View in GoogleEarth
 Okay, so it’s pretty cool. We have a 3D model in Google Earth and it all appears to be in the right location.
Next thing to do is turn on the 3D buildings and cloud effects.
 This is now looking great, though I think we can do just a little better. Let’s get some atmospheric lighting.
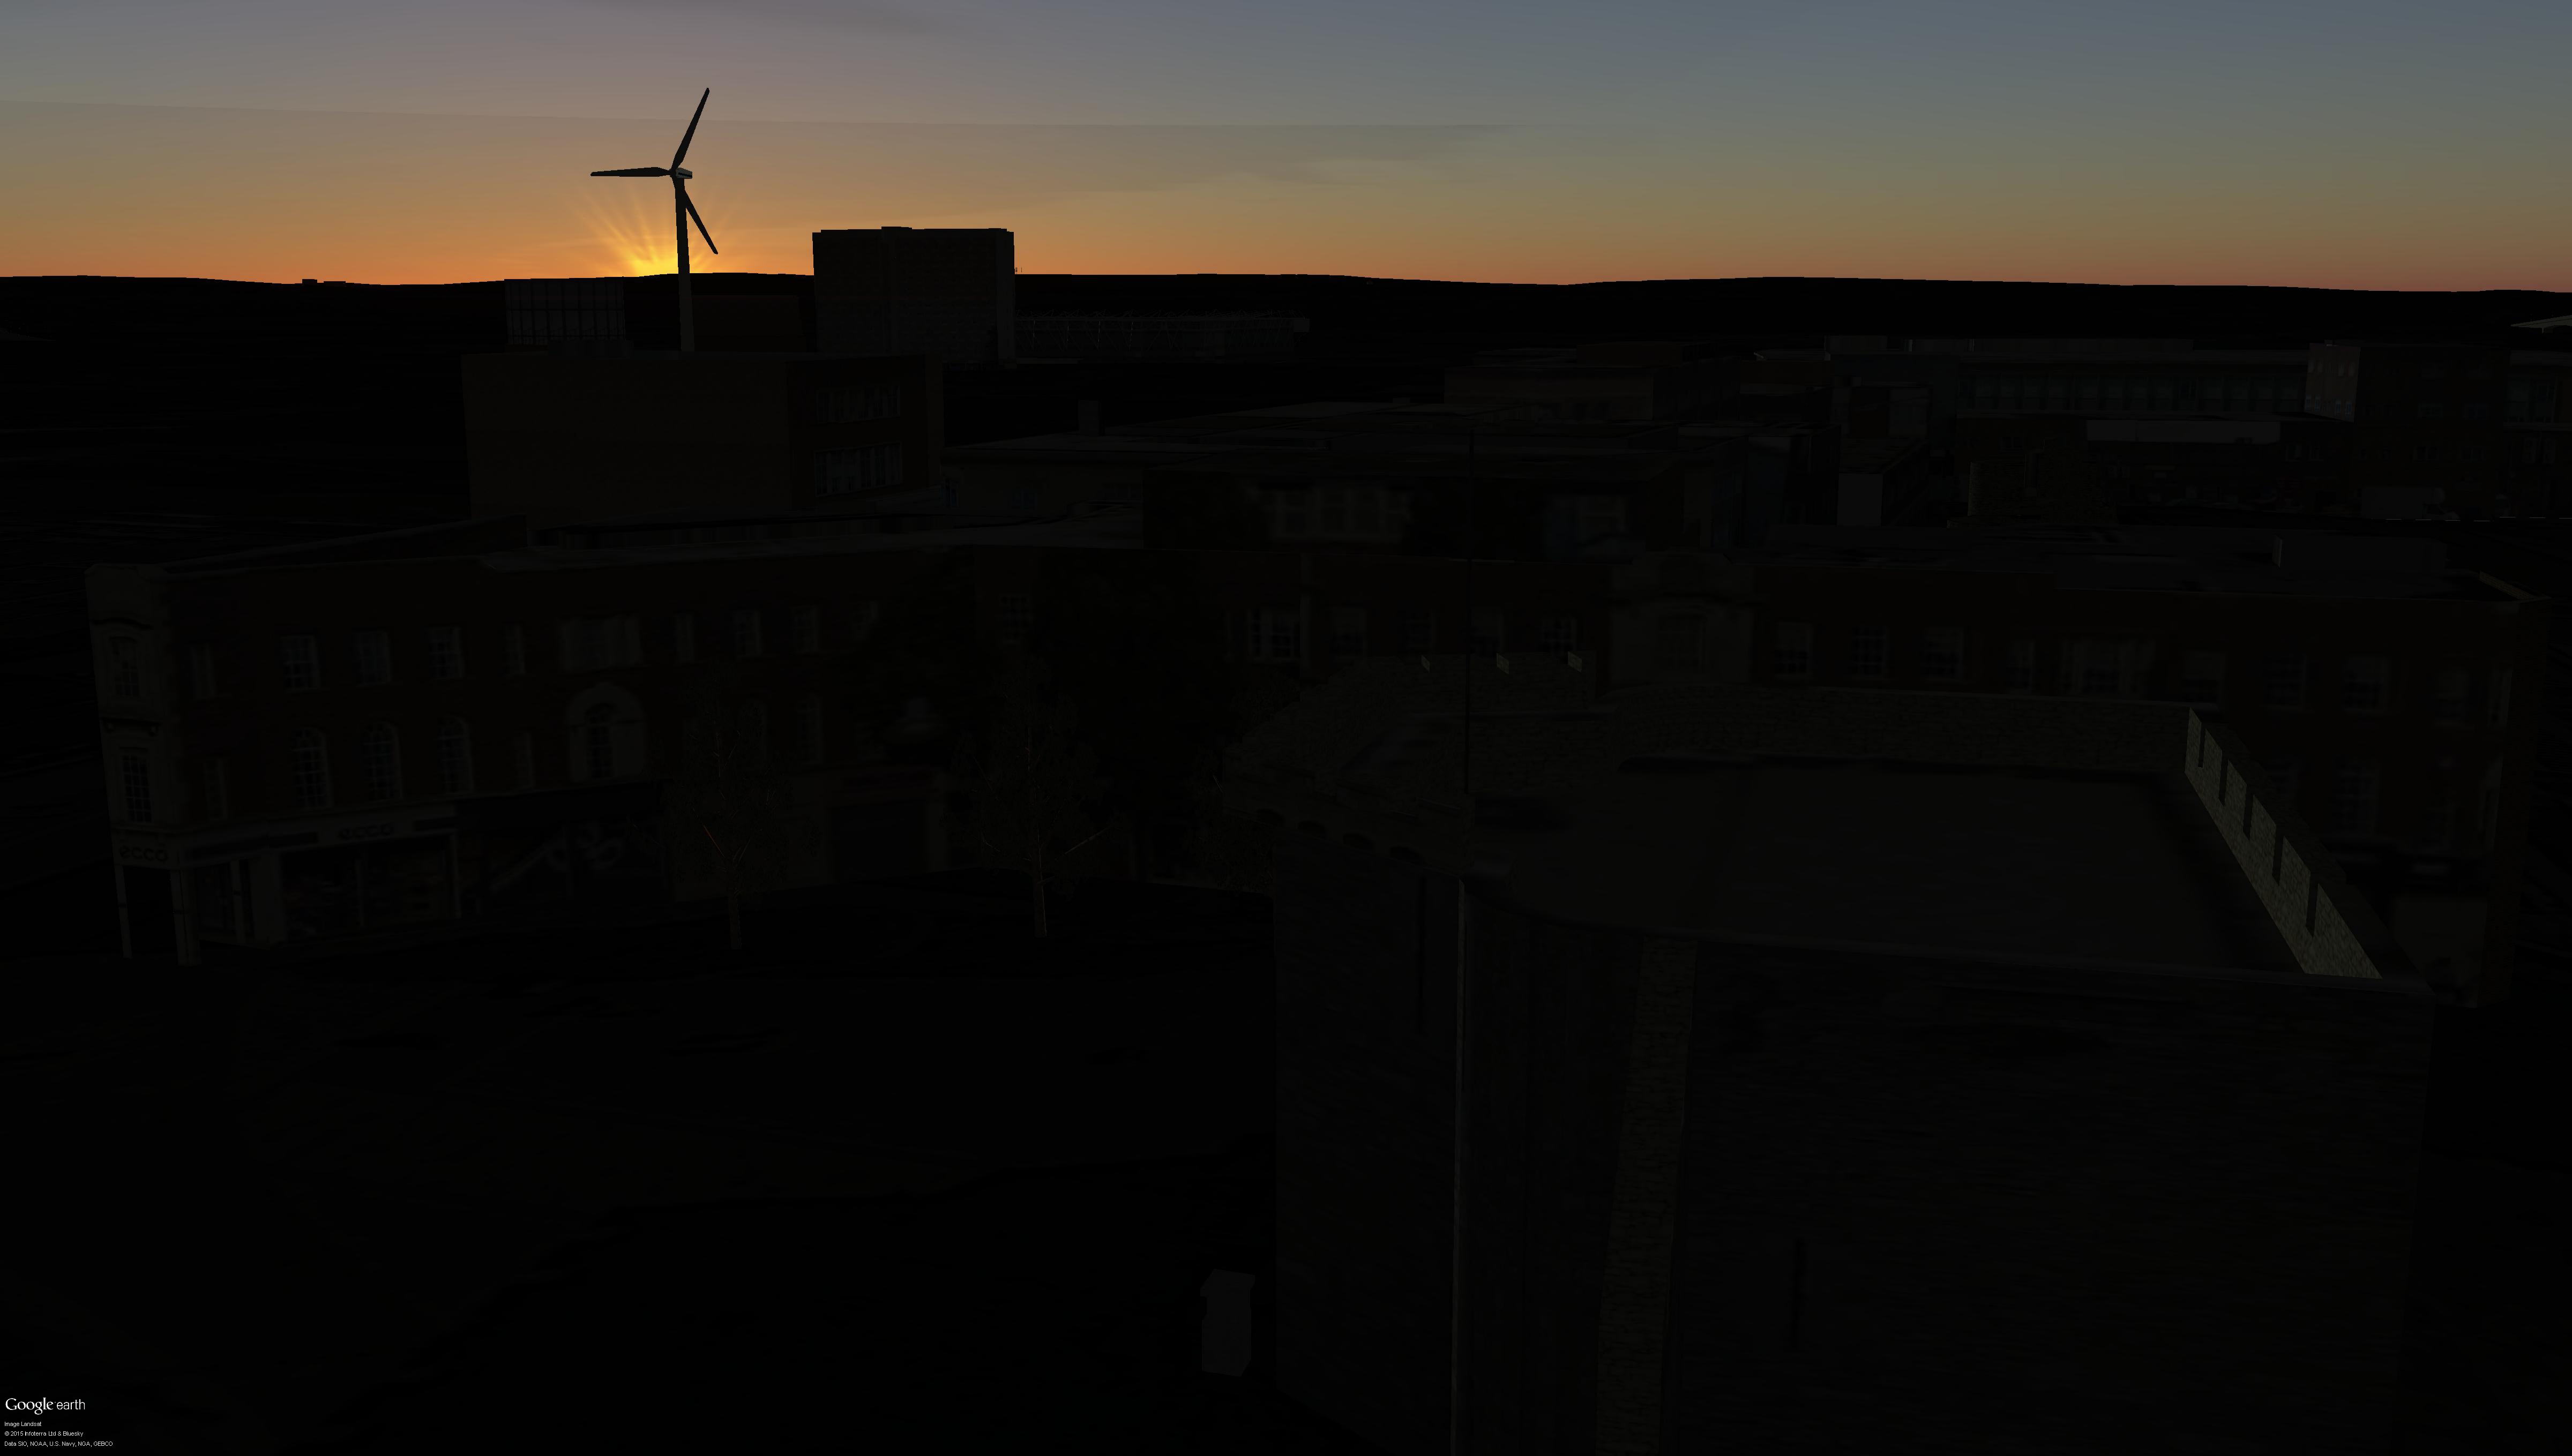
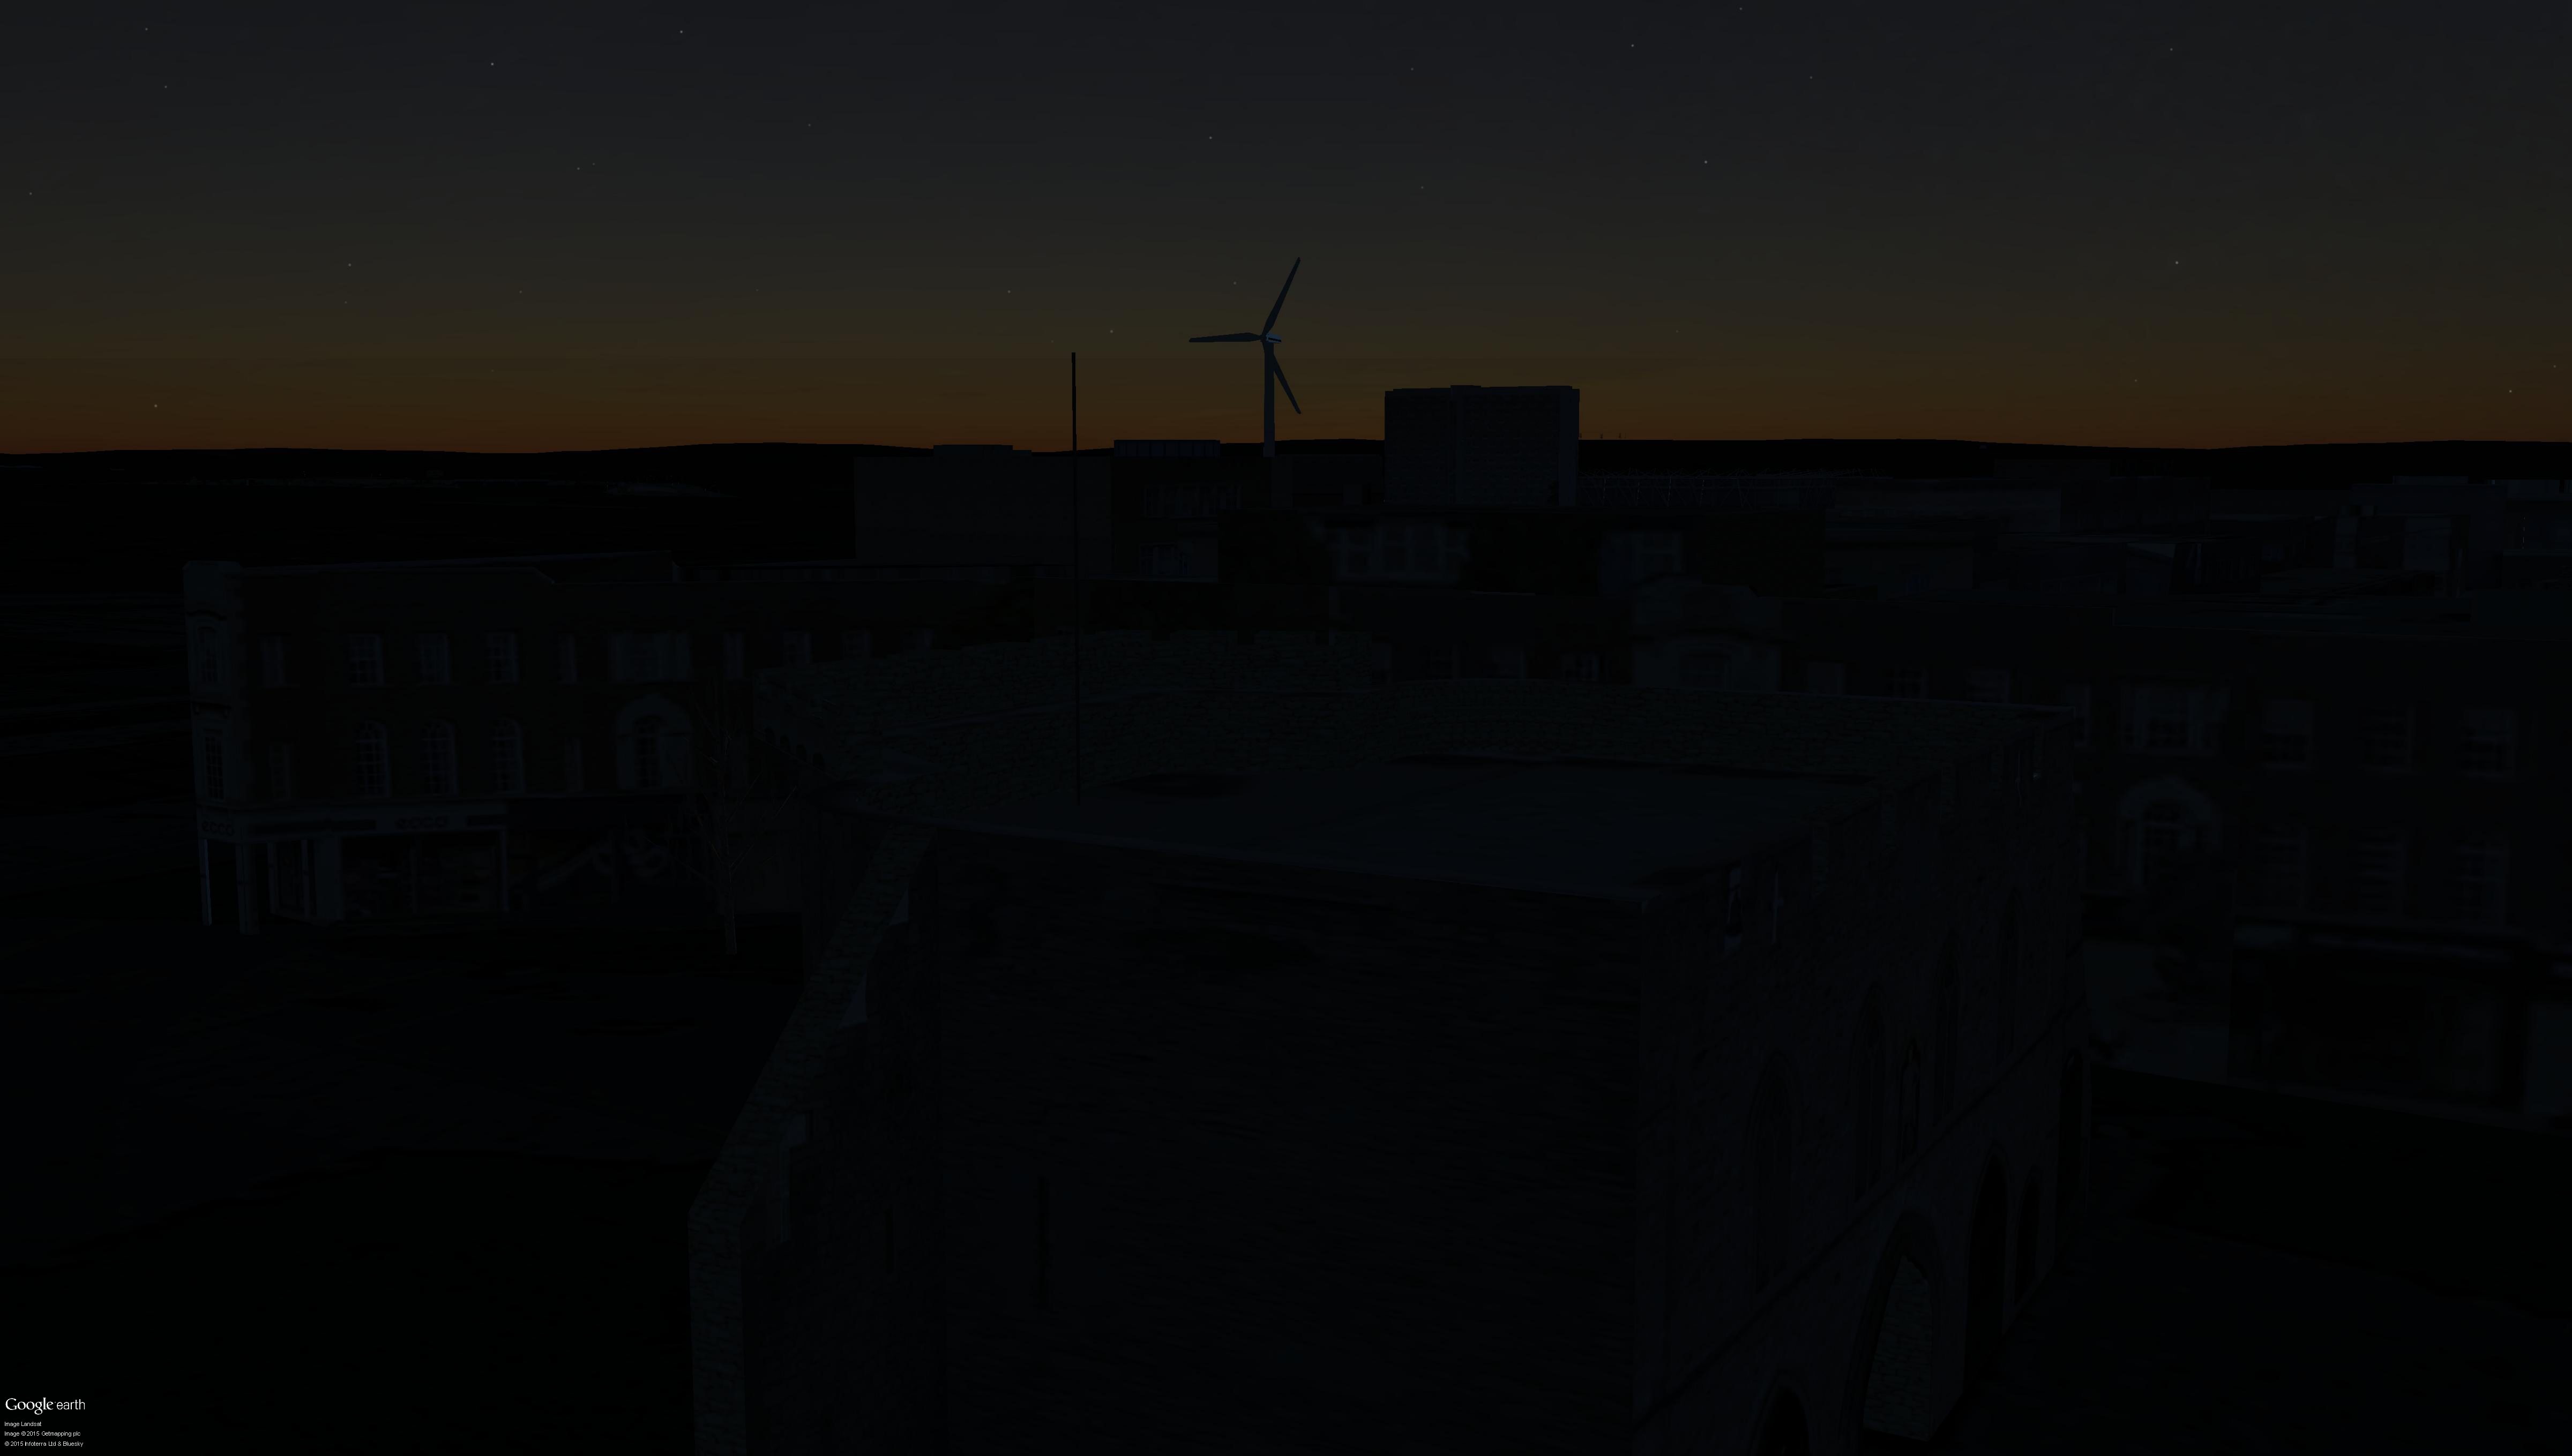
 The timeslide allows you to move through days of the month and creates some dazzling effects.
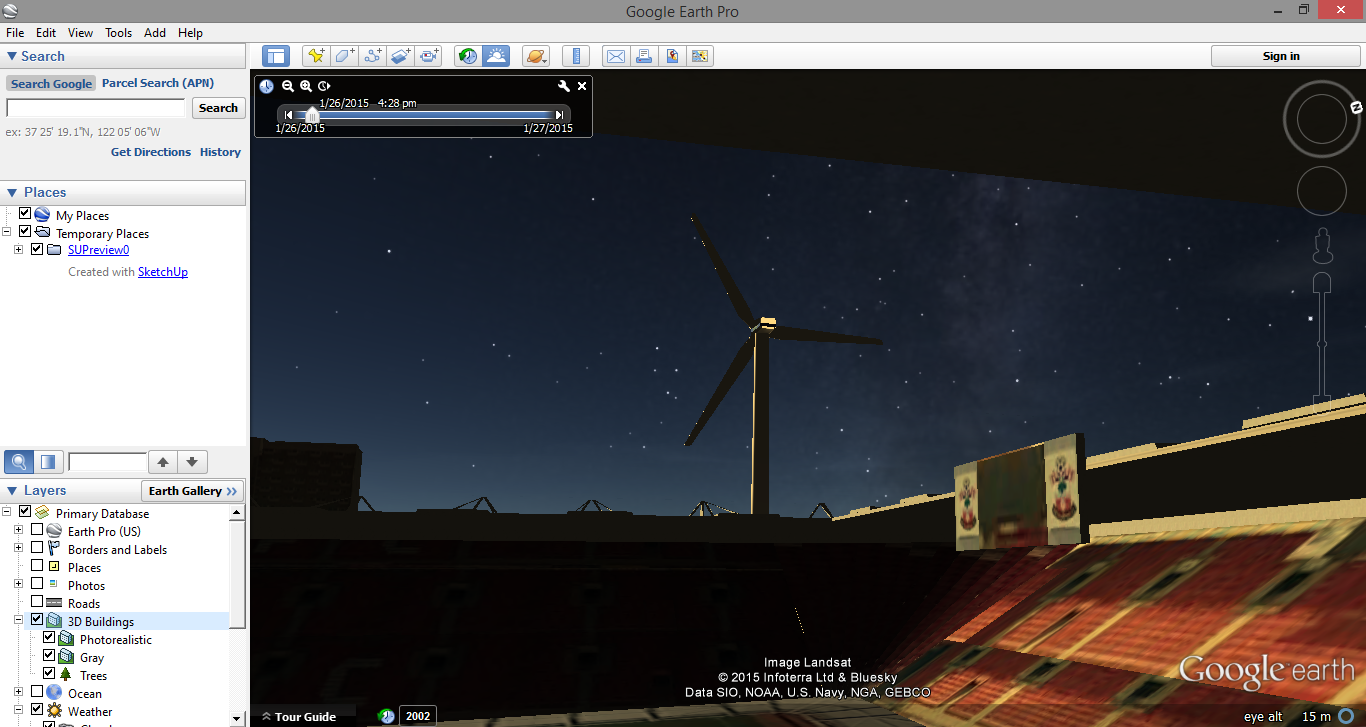
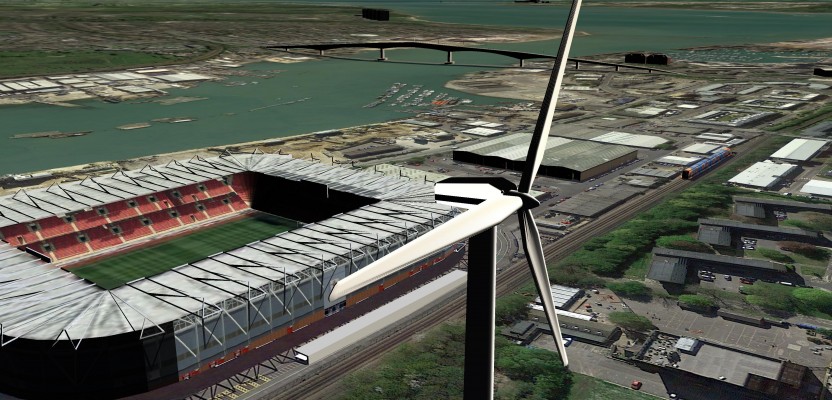
View from Southampton football club
So, I’ve moved the view to be looking from inside Southampton Football club out at the turbine.
When you want to save the image, go to file – save .

Find model and add it.
When you save the image, you can specify a high resolution image (see first image).
You have several options to save the model: you can save the kmz file direct from the Google Earth menu OR you can “save as 3D model” in SketchUp.
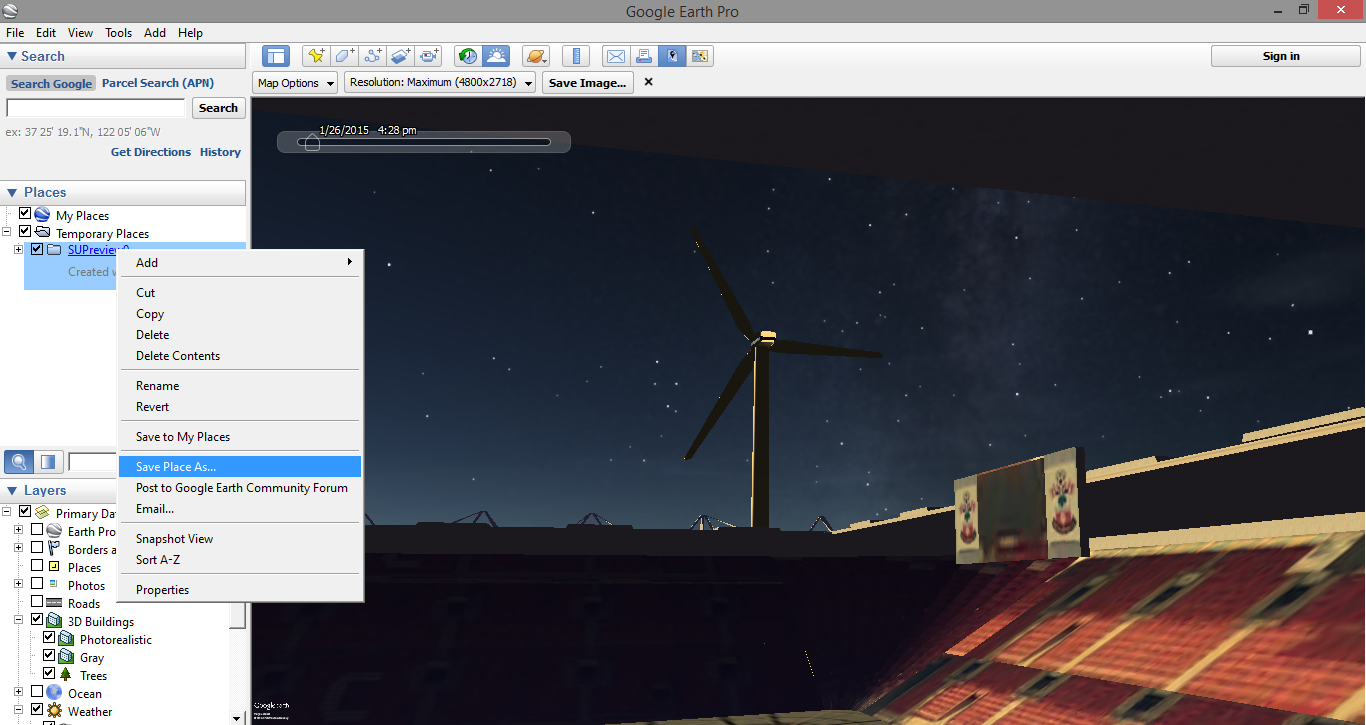
Save to KMZ
Here are some other screenshots exported from Google Earth of the same turbine. REMEMBER – I have created the turbine as a 80m hub Vestas wind turbine and it sits in a geographic location that I have dictated. Having tested this with other GIS, the visibility and heights are correct; they match representations which I have done in other systems.
Here are some niggles that I would like to resolve:
Obviously it is great to create these realistic representations, but I would like to lock it down so that if I were to send my model to someone, I can dictate the times of days or have certain lighting conditions to meet the 3D modelling criteria set out by SNH.
The turbine blades don’t spin: not a huge problem but wouldn’t it be super cool if they did?
Locked views: a little random, but it would be nice to have locked views for the user to use. This would ensure that a n00b would struggle to break it.
Would love to hear any ideas or answers to the above issues with QGIS, ArcGIS and Unity/Topaz