Creating a Real Online Map
In part 3 of this series (parts 1 and 2 are in the December 2015 and January 2016 issues), we build a web map using Microsoft Windows and Geoserver.
We’ll be building this to run on the computer’s “localhost” (http://127.0.0.1), which means that you can run the web map like a webpage but entirely on the computer (host) using the loopback interface; this is invisible to the rest of the world. Should you wish to host your web map on the internet so that it’s visible to others, I provide that information towards the end of this article.
To host your own map on the web, you will need your own (or administrative access to a) website that you can add and remove data from and that also has an address (this is required to route configuration).
Geoserver or OpenGeo Suite
We could install Geoserver, PostGIS, OpenLayers, and dependencies separately and then ensure that they are all married up, or we can download the open source all in one solution, OpenGeo, which is provided by Boundless.
By choosing the OpenGeo suite, not only can we guarantee that all components will marry up, we can also have a safety net should we need it, as Boundless provides an exceptional support package (commercially available). In my experience this method is the easiest way for a new user to get up and running with a full web mapping suite.
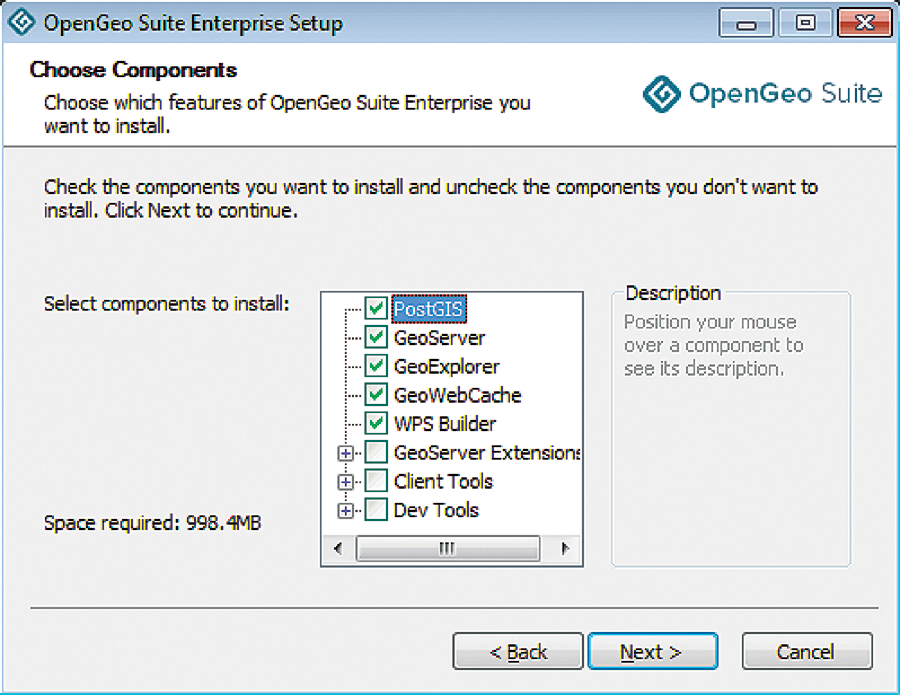
OpenGeo installation
How to Use OpenGeo
Download and install OpenGeo Suite from Boundless’s website. Note that you will be required to provide your email address and reason for install so that you can be contacted to ensure your system is set up and asked whether you require support. Don’t worry, it is still free!
Also, if you don’t already have it, download QGIS.
When installing OpenGeo Suite, choose the defaults, unless you wish to do a custom install, though I recommend that you add the Client Tools and Geoserver Extensions on the components section.
Once installed, go to your browser and type (or copy and paste): http://localhost:8080.
Now it’s smug grin time (if it works): this is your dashboard and allows you access to your suite of tools.
The two we’ll look at are the GeoExplorer and the Geoserver Admin.
Select the GeoExplorer demo, and it will open an online map. This is your (local) online map! The first thing to do is to login—the username is “admin” and the password is “Geoserver”—this can be changed in the settings. As an administrator you are able to control many aspects of the map; for example you can go to the Map tab in the top left where you will get a dropdown to either save or publish the map.
When you publish a map, you can define which tools you want your web map to show and then the size of the map. Conveniently, the software will provide all the code you require for publishing your map within a webpage.
Note that when the map is a local set-up, it will not be accessible to the web, that is, unless you can forward your information outwards (port forwarding). Or, if you run this from a web-based location, the map you publish will not be visible through the web. Though, for the purposes of testing and setting things up, you can create an html webpage on your computer that can use the iframe code.
A simpler way of sharing a map is to use the Save option. This will save everything and create a new map at a new URL (usually as a sequential number). This URL can be used by others, though beware that if they have the admin username and passwords they can make alterations.
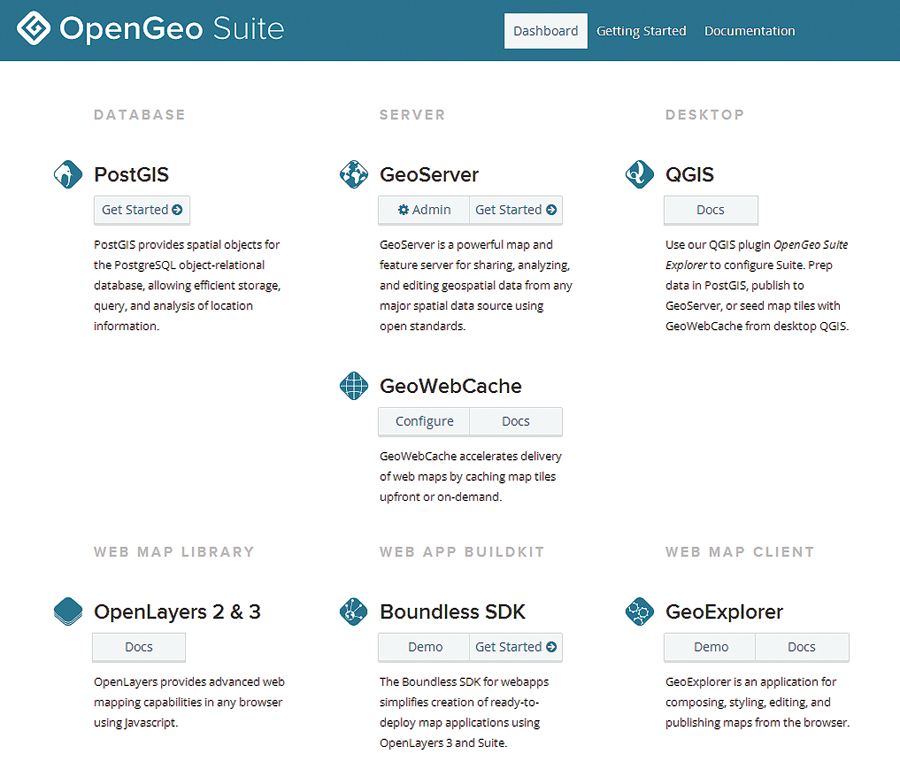
Your dashboard
Adding Data
The main question you may be pondering now is how you add data to this amazing map. The answer is that there are more options than I have time to provide!
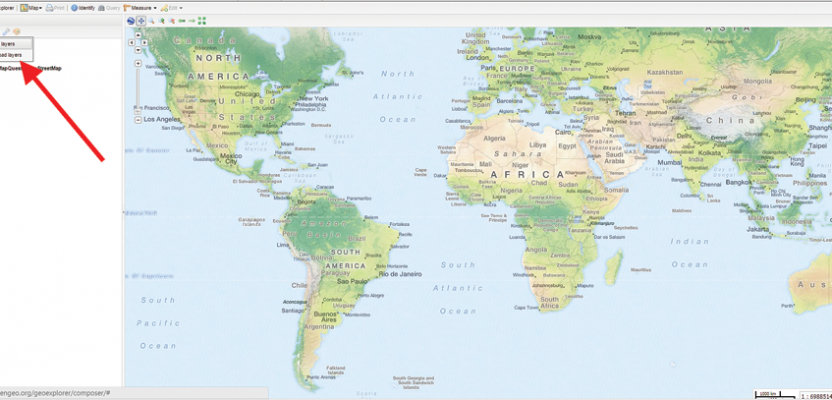
From the GeoExplorer map, the quickest and easiest way to add data is to click on the green circle with a white cross that says Add Layers. If you choose the Upload option, you can upload a shapefile that’s within a single zip file.
The most efficient way to add data (and the reason why so many people use OpenGeo) is through QGIS. To add the plugin, follow the instructions here: http://qgis.boundlessgeo.com/static/docs/intro.html.
This plugin allows you to simply publish your data from QGIS directly into your Geoserver so that when you click the Add Layers option in GeoExplorer you have them there at your disposal. What is really cool (yes, I used QGIS and cool in the same paragraph) is that the data can retain its styles/symbology, meaning that what you see in QGIS is what you create in your web map.
Build It So Others Can View It
There are several options available. The easiest, and the method that I have personally used the most, is using Windows Server. Windows Server 2012 especially operates more like Windows 7, and to set up an OpenGeo Suite instance is no different than the instructions above.

Adding layers
You could open a port on your machine and forward the information to another address; this is called port forwarding. This is not really recommended, and information will be relayed only while the connection is open. If you turn your machine off, the linked web page will fail.
At time of writing there is also an image of OpenGeo available on Amazon Web Services; the original Community version (2.x) came bundled with Windows Server 2012.
This barely scratches the surface of what the OpenGeo Suite can provide; we haven’t covered using PostGIS or even how to set up the print services from the GeoExplorer, but I hope it provides a way to start fiddling and feeling a little more confident that it is possible to get results with little skill.
For further information on OpenGeo Suite and how to set it up, look here: http://suite.opengeo.org/opengeo-docs/.
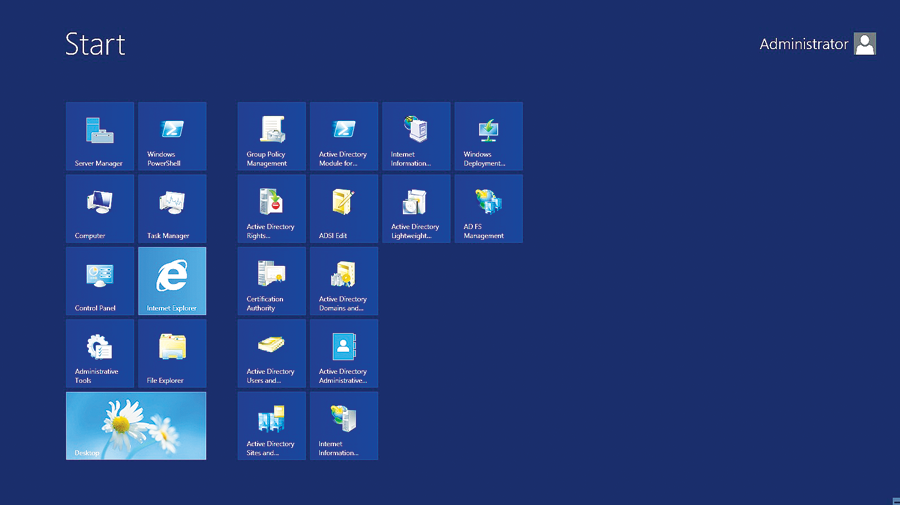
Windows Server 2012 interface