When QGIS revealed that they were going to add a 3D viewer, I was skeptical. Rumors were going around about it being a bolt on functionality and not really being fully adopted. To be perfectly honest, I was put off before there was anything to look at.
As screenshots started to appear from Lutra Consulting, the company behind the new 3D viewer, I started to get interested again. The screenshots I was seeing from the early development showed proper terrain and real 3D buildings.
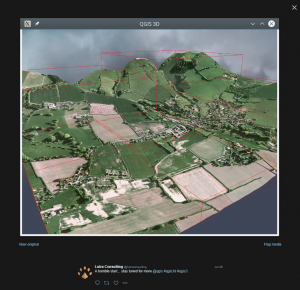
Posted July 2017: The first screenshot made public.
In mid-October there was a quiet little tweet from Lutra Consulting just simply saying, “With #QGIS3D available from nightly, please email us your images/videos so that we can publish it in the blog for #QGIS 3 release!”
How could I refuse a little play? So, this is what I posted on October the 18th, only a day after that initial post:
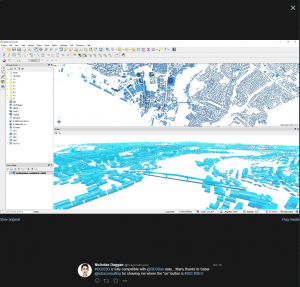
My QGIS 3D test
How to!
In true Dragons8mycat style, I’m going to show you through how to create the very same map.
- If you don’t already have OSGeo4W, download it from here – it includes lots of different open source software but most importantly the latest QGIS releases.
- If you already have OSGEO4W and the 2.99 QGIS nightly build, skip to X, otherwise stick around to see how to get QGIS
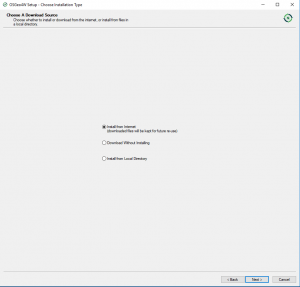
Stage 1 – Select “Install from Internet
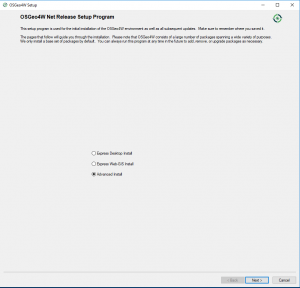
Stage 2 – Select ADVANCED install (important)
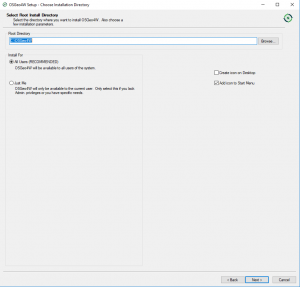
Stage 3 – Select the directory you want the install
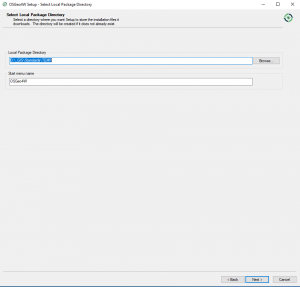
Stage 4 – Select directory for the temp files
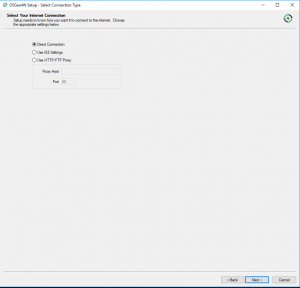
Stage 5 – Choose Direct connection
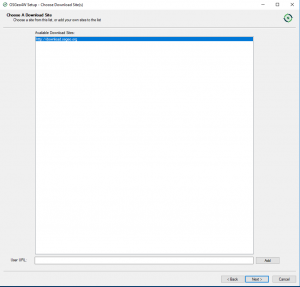
Stage 6 – Check the web address and click next
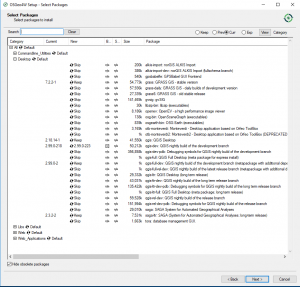
Stage 7 – Choose the nightly development build (2.99.xx)
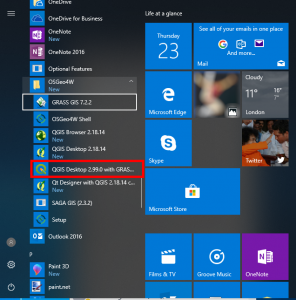
You should now have QGIS 3!
3. Convert your data to GEOPACKAGE. At the current time of writing, QGIS 3D prefers the multipolygon 3D multipatch. Don’t sweat it; this is easy to achieve. The example I made was from an esri multipatch shapefile.
If you have OGR2OGR, you can simply run something like this. Obviously, change it for the relevant file format and use the LATEST OGR version:
ogr2ogr -f GPKG [NAME OF FILE WANTED].gpkg [FILE TO BE CONVERTED].shp -nlt multipolygon
4. Turn on the 3D renderer – Make sure that the styling window is open (shown below) and click on the 3D cube symbol, check the “enable 3D renderer” box.
-

See the box, top right? Tick it!
5. Only one more step left to do…open the 3D window. Go to the view tab, at the top of the screen and then select “New 3D Map View”
-

Open the New 3D Map View
6. You should now have a shiny new 3D & 2D map.
But what if you don’t?
First, ensure that you are using a projected coordinate system and that you’ve checked the geopackage. I’ve found that these have been the main issues when things have gone wrong.
If these aren’t to blame, then make sure your data isn’t too large. Again, I found that rendering a 500mb file was hard going.
If all that fails, try a different machine. These are early days, and I’ve found that this renderer doesn’t like integrated graphics cards as much as it does the dedicated type, preferably a gaming card, although don’t let this put you off as it can be very hit and miss.