Mapserver or Geoserver … that is the question
Okay, let’s clear this up right from the start. If you are building a web map system, you are going to be looking at open source. Sure, there are other methods like Mapbox, CartoDB, QGIS Cloud, LizMaps and others but they mostly promise a free system for web mapping but then give you (a rather meager) 50mb of space or don’t include the tools you need. This is better for the smaller business but at the end of the day you will feel cheated. For full control you really need to build it yourself from scratch.

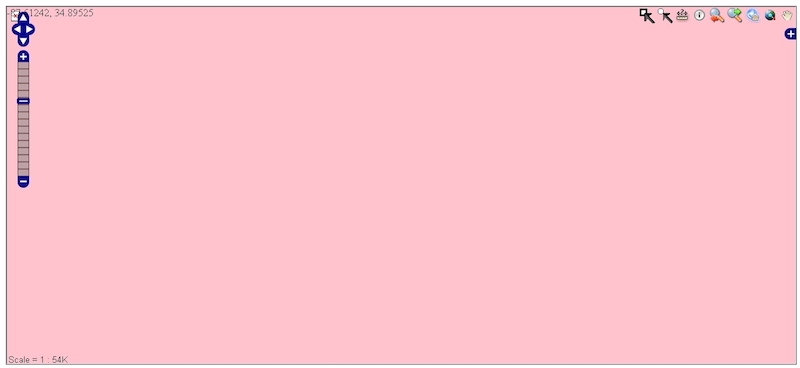
Your first map will most probably look like this…the infamous “pink tiles”
When I first started out with this web mapping 6yrs ago, there were 2 options if you wanted to create a web map, Geoserver or Mapserver. Both work with Windows & Linux, both are well developed and both are open source, completely free and extremely develop-able with some great tools included out of the box. The problem I had was choosing one….
On paper, Geoserver and Mapserver are pretty identical, both publish geospatial data from almost any format and have huge communities who can provide help and advice. If you get really stuck, there is also commercial support for both systems. The primary difference is the choice of programming language, although both systems use a combination of languages for certain tools: Geoserver is Java based whereas Mapserver is C at its core with a lot of PHP.
Okay, so let’s roll back, already we are talking programming languages! To get on the web you need a way of getting the data into a format that can be read by the internet. To do this you need a server, for maps you need a geo/map server, something that takes the shapefiles or dxf files and gets it onto a html page which can be put on a webpage somewhere.

A simple explanation for the map server
As you can see from the above diagram, the web server is the “converter” to get the data onto the internet, the data is “served” from the computer/server onto the internet. The format the data is most commonly used is Web Map Service (WMS) format.
Out of the box with both Mapserver and Geoserver you will get a server (Jetty/Tomcat/other), tools for conversion of data built in (GDAL, fTools), a LOT of projection systems (Proj4), OpenLayers (a web interface tool) and a demo map. Both systems initially install to your “LocalHost” which is a local network for your computer (it can’t be seen by anyone but you, though you will have a http address like http://localhost), to get the web server to be seen by the outside world you will need to adjust the settings in the systems server config to read the same as your outward going port connection (This may be worth checking out)
Mapserver or Geoserver … that is STILL the question….
So, going back to the Geoserver v Mapserver question, my first choice as a complete noob was Mapserver. Why? Because it sold me on its integration with QGIS; see my previous posts on how awesome QGIS is. Essentially you can build your map in QGIS and then hit the “export to Mapserver” button and you have a webmap….if only. Don’t get me wrong, it is 100% better than building the map yourself but to a noob I assumed I could just use shapefiles and rasters and shunt it all to the internet with a shiny big button.

THERE IS NO ONE CLICK BUTTON
Once the Mapserver is installed and QGIS is up and running I stupidly expected to have a fully web mapping experience which would take over the world … not quite. QGIS provides you with a .map file which you then tweak and then you need to build a html page and the map tools (openlayers) around it. I may have spent my youth programming my Sinclair ZX80 & ZX81 but this was a huge step to start understanding how CSS & HTML worked and the OpenLayers (I’ll refer to it as OL from here) worked.
Tip 1: Firebug is your friend – you’ve probably seen a little picture of a bug in the top right of your screen when using Mozilla Firefox, this is a great tool for exploring the code which makes up webpages. Turn it on and waft your mouse around the page & you can see how bits of scripts work (or don’t work).
I am not afraid to say that my first map resembled something worse than a bad ZX Spectrum game, the tools didn’t work properly due to bad links, some of the layers didn’t draw up right and worse of all I felt completely out of my depth. I would post questions on the forums and it would appear that the questions I had were SO BASIC that they were mostly ignored.
After 1 month of developing what I thought would be a new Google Earth, I put it on hold to think things over.
Don’t give up, it’s not as bad as you think
After a couple of months of chewing it over and feeling like a failure, I got back on the horse & read a couple of tutorials on the QGIS website written by the rather amazing Anita Graser. I’m not ashamed to say that I have a bit of a fan-crush on Anita, I contacted her on Twitter a few times when trying this system and she was so patient and really helped to make it easy to get going. Needless to say, after another couple of weeks of trial and error, I had a web map up and running.
Tip 2: Don’t be afraid to ask! Sites like GIS StackExchange are supported by some of the top people in the industry with some great advice. Even the dumbest questions get answered, we’ve all been there!!
Tip 3: Download and install PostGres & PostGIS – PostGIS is a spatial database system, much like the ESRI geodatabase, which is SQL based & is a more efficient and flexible way of storing spatial data. It is the most common way of storing data for web mapping & you will find it easier to work with this format in most systems.
A change is as good as a rest
Although I was having success with Mapserver, you always get that niggling thought that the grass is always greener on the other side, so decided to try Geoserver.
Much like Mapserver, Geoserver works straight out of the box on the localhost and has a nice interface for importing and managing the data.

Geoserver interface
To be honest, although the Mapserver had an easy system for making a map in QGIS, this interface made it easy to understand what was going on. I could load up layers, apply styles (in SLD format) and then use the layer preview to see what they would look like. The only downside? There is no map system integrated into it, so it can server WMS, WFS & others but you need to have a little HTML know-how to build it all into a map.
Tip 4: In Geoserver, layer groups are your friend. With these you can either create a basemap by grouping several layers together OR you can server a simple static map by using the wms direct in your browser
Tip 5: Static and Slippy…..There are 2 different types of web map, a static map which is nothing more than a picture or an interactive map which is known in the industry as a “slippy” map.
The great thing with Geoserver is that if you DON’T want to build a web map and just want to supply layers via wms to people, it is near perfect! The wms feed can be used within most GIS systems like QGIS, ArcGIS, uDIG, CadCorp and GRASS, to name a few. Again, the time and effort with this system is mostly spent designing the web map interface, calculating where tools need to sit, getting the legend to expand properly or getting the frame size just right with the company logo in the right place.
Lessons learned
The one thing I have learned from all this? Don’t be afraid to dive in. Everything I learned from playing and trying to build in Mapserver, although in a different language, was similar in structure within Geoserver. The components and way the core works is essentially the same, it’s just deciding what you prefer in a system.
Once you have started to build one of these systems you begin to respect and appreciate the complexities of software like ArcGIS & QGIS but at the same time you start to understand how it all fits together. Although a stressful and humbling experience, it is one I recommend to any GIS noob.
Why go through all the pain?
Okay, so here is where I unveil the ninja-tricks. Why go through all the pain of the above? What if there was a system which had the awesome interface of Geoserver but also integrated with QGIS, automatically installed PostGIS AND provided a map interface with a plethora of useful tools….all open source with the safety net of support (at a fantastically cheap cost) if you need it?
It’s true, I kicked myself 2yrs ago when I found OPENGEO SUITE by Boundless. Although it has its quirks, it takes all the pain out of everything. Sure, there is some configuration to do, some of the tools like the print and CSS styling don’t work out the box but that is what people like me are here for (contact me for installs of OpenGeo or help adding tools).
First off, this isn’t a sales pitch. Although I install OpenGeo Suite systems, I do it because since I found it, I want the world to use it….you could spend hundreds of thousands of pounds on a web mapping system which has a GIS front end and a web map output. OpenGeo Suite really is as simple as creating your map in QGIS (or ArcGIS then using GeoCat bridge) and then exporting it to Geoserver, you then use their GeoExplorer to show the layers.

Standard GeoExplorer interface
The point is?
Building your own web map system as a noob is scary and complex, lots of new terminology & methods. The developer & programmer types will bombard you with questions about your tile caching or getfeatureinfo whereas the average user will be asking whether they can upload their new NetCDF file.
Your experience will probably not be as bad as mine, things have developed FAST! Mapserver is now part of QGIS and there is a “QGIS Server” which is Mapserver based & Geoserver is now in version 2.5 – There are now so many users on Twitter & StackExchange that getting help is very easy.
My advice? Build a solution from scratch as a hobby, spend a little time every evening having a read and a play with either Geoserver or Mapserver….try and put your own map on a localhost system. When you can do that, install OpenGeo Suite and dazzle your employer!