Tech tools for capturing change over time are changing… over time.
Editor’s note: “The Purpose of Time Is to Prevent Everything from Happening at Once” is the title of a poem by X. J. Kennedy. But what if we want to know—all at once—everything that has happened at a particular location over time, for engineering or change management? As Kevin Lidtka examines in this article, there are new tools to gather progressive 360° snapshots.
Time is the rate that we experience change here on Earth. It can either be a friend or an enemy depending on our circumstance; sometimes it can fly by at shocking speeds and other times it can’t move quickly enough. Anyone with kids knows that we’ll do all we can to try to save memories, and we’ll do so in all kinds of ways.
What a fortunate time it is to live in when we can record our experiences in incredible resolution and clarity! I may not think I will ever look back at those 1000 pictures I took of my kid’s birthday party, but something tells me that by taking those photos I’m doing my future self a favor.
I know there will come a time when my kids will be all grown up and out on their own, and I’ll find myself in a quiet house with nothing but my faded memories to keep me company. How wonderful will it be to hook up that harddrive to the TV and look through old videos and pictures of times past! I’ll have a digital storage of my memories.
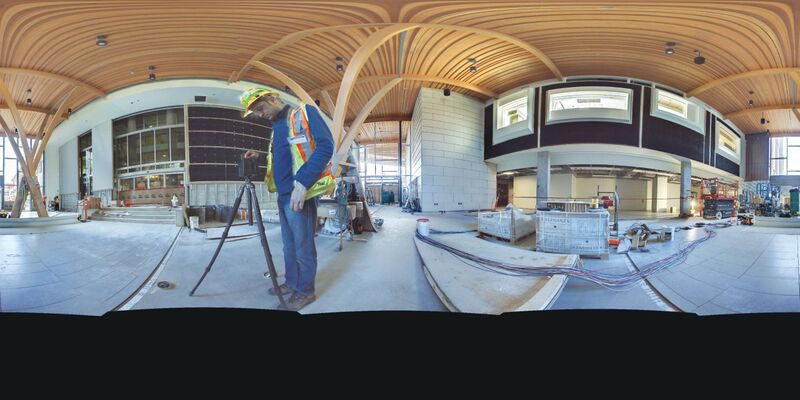
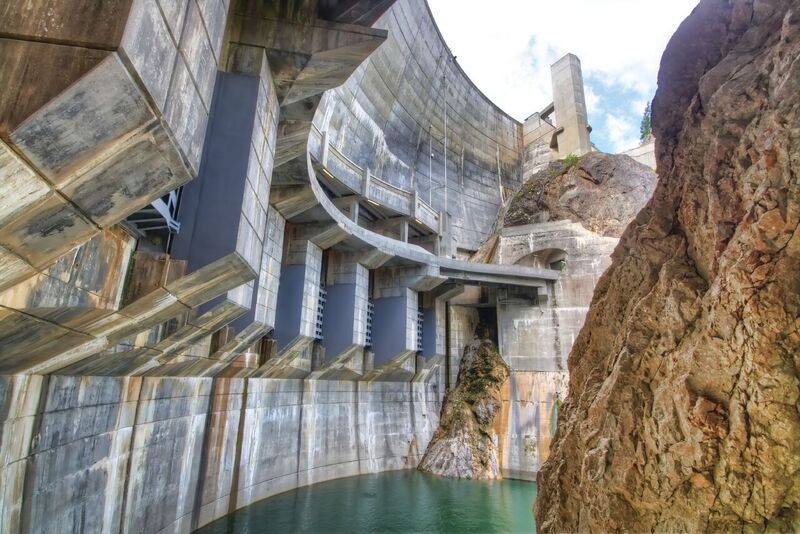
A crewman from Underhill Geomatics, Inc., uses an iStar Fusion camera to document the construction of a hospital in Vancouver.
Old-school Panos
Being able to control time would be pretty cool; the idea of setting up a process in which you can capture an environment for work at different stages in time seems futuristic. Eight years ago the method was so lengthy and prone to errors that it was easy to talk yourself out of it and opt for just a folder full of still shots taken from the borrowed office camera.
Sure, there were push-button methods of capturing 360° images, but it was very expensive and hard to justify. Instead, I bought a wide-angle 8mm lens for my DSLR Nikon and a special tripod bracket that could be set up to lock at certain angles.
I would mount the camera on this bracket with the camera sideways in portrait mode, hook up a shutter remote, set the aperture and other settings depending on the lighting conditions in the room, snap three photos (one for each exposure level for manual HDR), turn the bracket until it clicked at the next angle, take another three images, keep turning until I completed the circle, and then I faced the camera up at the ceiling to take another two pictures 90° from each other.
I would have to do this in each room on each floor, in each doorway, stairwell, basement, outside, on the roof and anywhere else that I needed. By the end of the day I probably made a couple of mistakes like kicking the tripod legs, mislabeling an image file, or keeping the shutter open too long while looking toward a bright window. I wouldn’t even realize I’d made these mistakes until I got back in the office and was up to my neck in image processing.
The processing was another fun journey. The images needed to be stitched together into a panorama. I had a good software for that called PTGui, but back then it wasn’t half as easy as it is now. Often I couldn’t get an image to stitch correctly and had to throw that setup out completely. The ones that did work, though, had to be done three different times for each separate exposure. The three panoramas then were merged into an HDR image using another piece of software such as Photoshop or Photomatix.
Once that image was complete, I would then bring it into another program called Pano2VR that would turn it into an actual 360° file that could be moved around with the mouse like in Google Street View. I could create hot spots that give information about an object in the picture and advance to another camera location.
The final result was pretty impressive back then, and we were proud of it, but boy oh boy was it a process to get there!
Today’s Simple Cameras
Capturing and viewing 360° environments nowadays is so dang easy there’s no excuse not to, and there are many camera choices for implementing some kind of 360¡ imaging in our work projects. There is something for every budget, too. You could spend $10,000 on a camera rig or just use the 360° feature in your new smartphone’s camera. I’ve had to use this in a pinch, and it works quite well.
Many companies offer simple dedicated cameras, like Samsung’s 360° camera called the Gear 360°, which is a couple hundred bucks and can capture 4K-resolution 360° videos. If you need just something to get the job done, you could pick up one of these on Amazon and mount it onto your hardhat, then walk around your job site once a week. Upload the videos to YouTube and use their 360° video feature to look around the video in all directions while it’s playing. Pretty neat stuff.
Documenting Changes
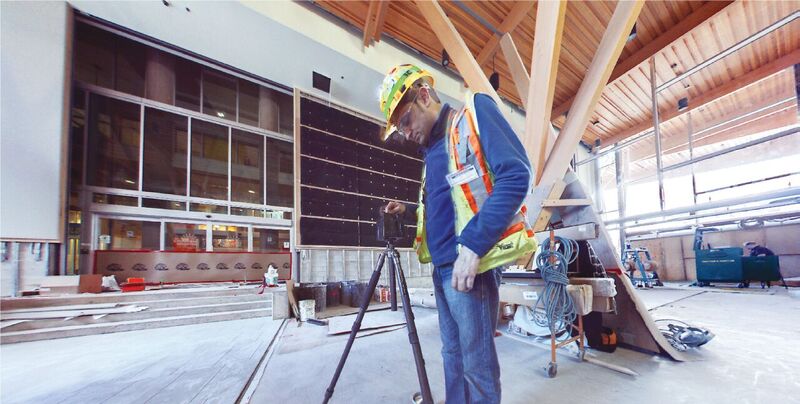
For someone a little more serious, I would recommend looking into a set of tools that are dedicated to documenting site changes. One example is a camera unit called the iStar Fusion. It’s a little pricy, but man is it cool! I got to play with one at a conference in Las Vegas and have been bugging my boss for one ever since. A camera like this will be more than enough to easily document a construction site in amazing resolution and full 360° field of view.
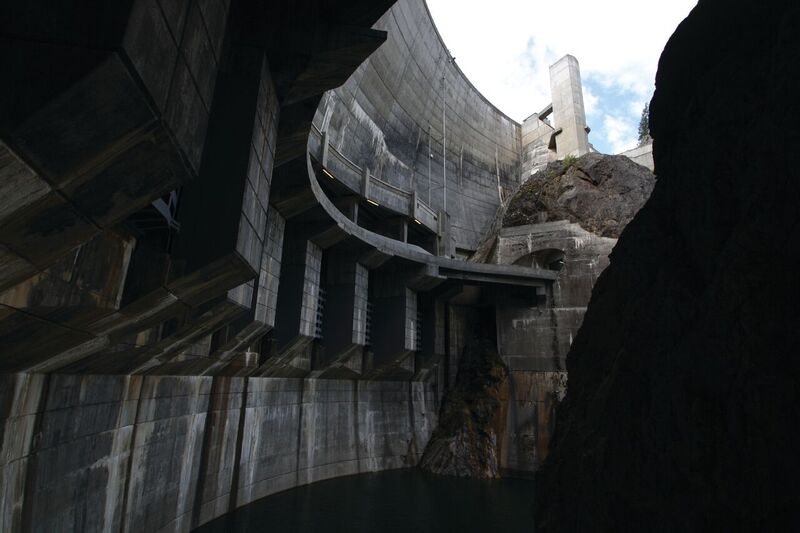
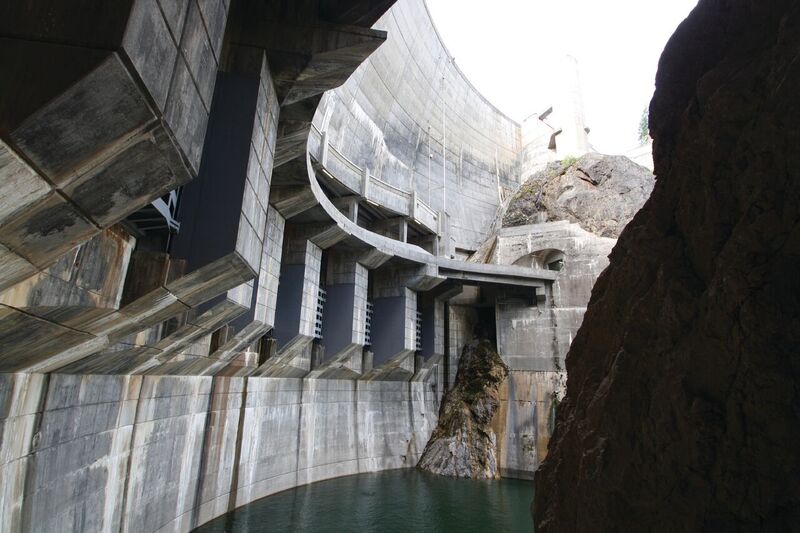
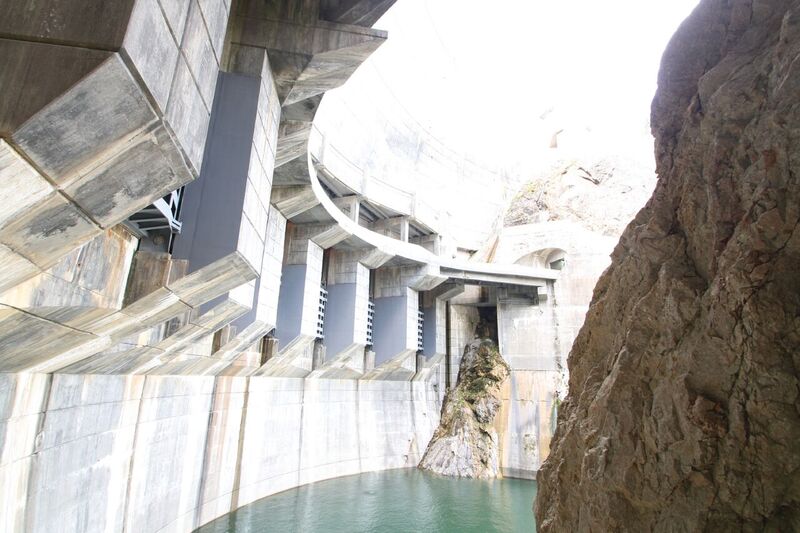
Case in point is a project that went up in Vancouver, BC, Canada. The site is a massive 640,000 sq-ft children’s/women’s hospital housing center that cost $350 million to build and opened at the end of 2017. The construction contract was given to the Affinity Partnership Consortium and the CHW Design Build GP, which included Balfour Beatty Construction and Ledcor.
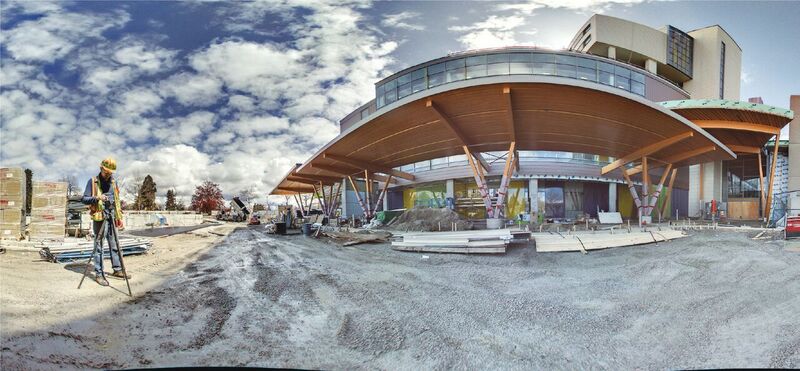
A 360° view of the hospital’s exterior.
On a construction project of this size it’s common to photo-document every step of the construction process. The photos are used as a way for all the various teams to view the progress of the build and analyze any risk items that may arise, as well as to see and discuss the various as-built conditions.
The cameras also help progress audits tremendously with their ability to time-stamp every photo taken. The photos can be used to make sure contract requirements are being met as well as to help make ensure that local jurisdiction compliance is being followed.
Local surveyors, Underhill Geomatics Ltd., were given the task to document the hospital build, and they used a couple of the iStar imaging units. The cool thing about a dedicated 360° camera system is that with one button-click you can capture the same amount of data in one photograph as I was capturing with eight separate photos. The iStar units produce high-resolution 50 megapixel 360 photos that can even be captured in HDR, as well.
I’m not writing this article as an iStar shill; I know it’s one of the many units out there that can capture 360° images. iStar happens to do a very good job though, so I can see why Underhill chose them as their imaging units for this hospital project.
Underhill was required to take new photos at least once per month. They would capture the entire site immediately after each phase of the build; this means that they were seeing the evolution of the entire building.
They documented before and after walls, ceilings, and floors and saw all the wiring, HVAC, electrical cabinet, and corridor installs.
They were there before and after all the drywall went up. This alone is a valuable tool to have. Imagine walking up to a finished wall with your tablet, then pulling up a 360¡ image of this wall before there was drywall on it. You would have an X-ray-like ability to see exactly what is hidden on the inside of that wall. It would be the same with the ceilings and floors.
(My dad did something similar with a camcorder back when he was having his house built. When the house was still nothing but studs inside and the construction workers left for the day, he slowly walked through the house with a camcorder, focusing on all the walls and ceilings and the way that all the plumbing, wires, and junction boxes were routed and hooked up. Later when we had moved into the house and he wanted to do repairs or upgrades, he would pull up that video and pause on a certain area, then note what would be behind the wall and where. Using that info. he knew exactly where not to put a screw if he didn’t want to have to worry about cleaning up after a punctured sewer line.)
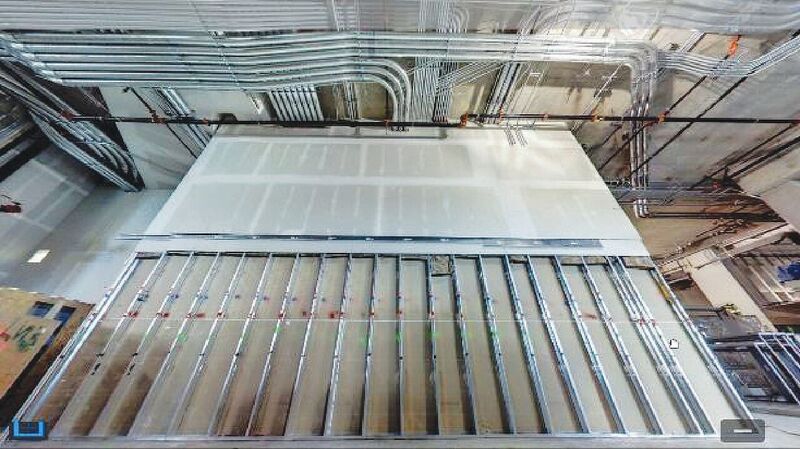
Capturing 360° images of drywall as it goes up gives you X-ray-like vision.
Showing Off the Data
Underhill took 5,900 photos during 170 site visits (as of the time this article was written). You can imagine that visiting the site so often and taking so many photos in so many rooms and locations would amount to a huge pile of data that would need to be organized and presented somehow.
Underhill used their own application called PhotoDocufy. (There are many similar programs out there, and they all have the same general features. Basically they offer an easy, private way to share your projects.) Underhill provided their clients with a link that runs a viewer showing all 360° images organized by date and location, viewable on any computer, tablet, or smartphone.
Each floor had a floorplan with little red dots showing the location of each 360° photo. Clicking on one of the dots takes you into that view. Inside the view you can look around by clicking and dragging your mouse, and as you spin the view around you’re seeing what the site looked like at the time the photo was taken.
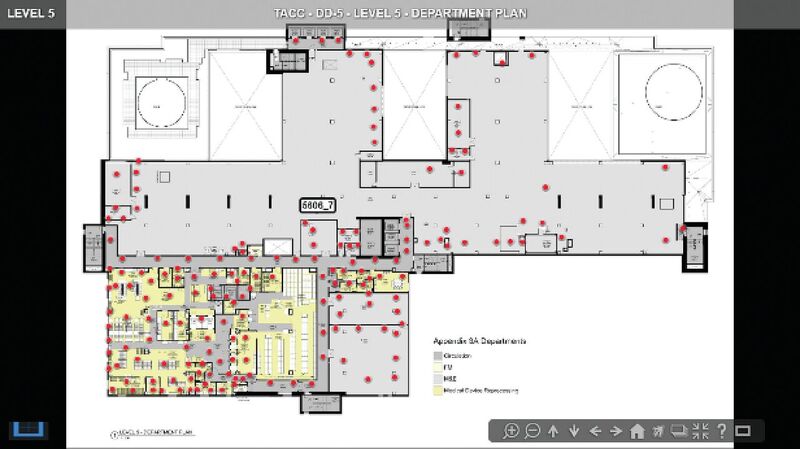
Underhill’s PhotoDocufy program places hotspots showing each 360° image location on a shareable floorplan.
Inside the view are little markers that show the location of another camera location. When you click on one of those markers, it jumps you over to that spot, in essence taking you on a virtual tour of the site. I imagine there’s a way to view the same location but from a different time that the photo was taken. A creative, talented person could probably take still images at each time period of a certain wall or location, then stack the images together in a PDF. As you scroll through each image, it would almost be like watching a time-lapse of that area being built.
Now that would be cool!
So what are you waiting for? Have I convinced you yet? Go out there and find some way to start taking photos of your job sites. Just type “360° camera” on Google and see what comes up. See just how easy it is to start documenting the progress of your projects. You don’t have much to lose besides money and time, but you will be doing your future self a favor. Plus, you are basically building yourself a little time machine. To me that makes it all worth it right there.
For a primer on using 360° digital panoramics with underlying laser scan data, see Geoff Jacobs’ (The GeoDude) article in xyHt’s December 2017 issue.

The 360° view of the still capture further up this page
High Dynamic Range Photography
HDR is when separate photos are captured at different exposure levels, then merged together into one photo. You need at least two images to do this—an overexposed and underexposed image—but three work better.
Three-photo HDR takes one photo with low exposure, one at normal exposure, then one at high exposure.
Low exposure
The low exposure looks very dark, but you are able to see details within really bright areas like the clouds in the sky or outside a bright window (if you are inside looking out).
Normal exposure
The normal exposure is a typical photo that you normally see with details lost in the bright areas as well as in the shadows.
Overexposure
The overexposed image looks super bright and washed out, but you are able to see details in the dark shadowy areas like under a roof eave or inside a dark open door (if you are outside).
Merged!
When you merge all three together you get a photo with a high dynamic range (HDR) of details and information that you couldn’t normally see from one single photo.
For more on the value of 360° images, read the GeoDude’s take here; for more from Kevin Lidtka, check his xyHt archive.